Raja Swarup Singh of Jhind
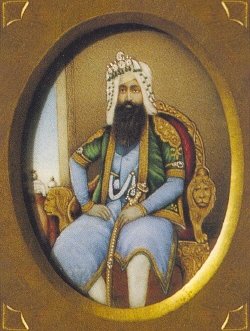
It is a misconception to think the British fought on the Ridge alone. From the very beginning of the mutiny in May, standing by their side was Raja Swarup Singh of Jhind.
It was not the first time the Jind State had shown its support for the EICo – during the First Anglo-Sikh War (1845-46), he had provided them with men, supplies and carriage, for which he had been rewarded with territory. Although his help was not taken up for the second act of that war, the mutiny gave him every opportunity to show where his allegiance lay.
Receiving word of the outbreak in Meerut and Delhi, the Raja mustered his men and marched at the head of his troops on the 12th of May from his capital Sangrur to Thansesar – halting at Ghadban, he ordered his commander, Kahan Singh, to join him with every man and gun he could procure. Thus ready, he then sent his greetings to the Commissioner of Ambala and placed himself at his command. His first orders were to march to Karnal, protect and station and keep the road open. He further collected supplies for the army advancing from Ambala with the ample help of the Tehsildar of Safidon, who assisted in collecting carriages and stores to Karnal for the use of the force. Then, by forced marches, Raja Swarup Singh reached Thanesar on the 15th of May.
He left Thanesar on the 18th of May and reached Karnal the same day, a distance of some 35 miles. Here, he met with Captains Hodson, McAndrew and Lake, who gave him orders to protect the city and cantonment – no easy feat, considering there was no one in the surrounding area who he could trust – but Karnal was saved from plunder and destruction, not by the British but the Raja of Jind. It was with an escort of the Jhind Raja’s men that Hodson made his daredevil ride from Karnal to Meerut and back while the Raja himself undertook to secure the Jamuna crossing at Bhagpat and then marched with Captain McAndrew to Panipat, engaging with the rebels and relieving them of a copious quantity of arms and ammunition.
It was also with his help that the Delhi Field Force could move at all. All along the road from Karnal to Delhi, his men repeatedly cleared the way, fighting the rebels at Panipat, Samalkha and Rai. It was with the help of the Jhind Raja that the Karnal road remained in British hands throughout the mutiny, his men continuing to provide support to the various convoys heading towards Delhi and in reverse, escorting the sick and wounded on their way to Karnal.
Raja Swarup Singh joined the British camp on the 7th of June at Alipore. Although he did not participate in the battle of Badli-ki-Serai, his cousin, Resaldar Punjab Singh, under the command of Captain Becher and Hodson, would display outstanding bravery. Together with the British, Raja Swarup Singh pitched his tents before Delhi on the 8th of June, sending his men to settle the remaining rebels who were still in Badli-ki-Serai.
During his stay on the Ridge, the Raja of Jind was rarely off his horse or out of his armour, consisting of helmet and chainmail, and appeared to care little for his own comfort. Like a true warrior, he led his men from the front and fought with them, taking on the rebels, side by side with the British, wherever and whenever called to duty. He fed, paid for and clothed his force from his own coffers and provided horses for Captain Hodson’s use for that gallant troop, Hodson’s Horse.
Until the 18th of June, Raja Swarup Singh remained on the Ridge – then, hearing of disturbances in his own territory, he rushed back to Jhind to punish the rebels. Problem solved, but deeming it prudent to remain in his territory for the time being, he continued enlisting recruits for the British cause. He would send his men out to suppress the Hansi and Hissar rebellion while 360 of them would accompany Hodson to Rohtak. He rejoined the British on the Ridge on the 9th of September, just in time for the final assault on the city.
The undaunting courage shown by Raja Swarup Singh and his men who kept their ranks and never waivered in loyalty to their leader, are not mentioned in the returns or given their fitting place in the annals of the mutiny of 1857 – so as we read these accounts it is worth to remember that behind every battle on the Ridge, fought the men of Jhind.
Reinforcing the Ridge
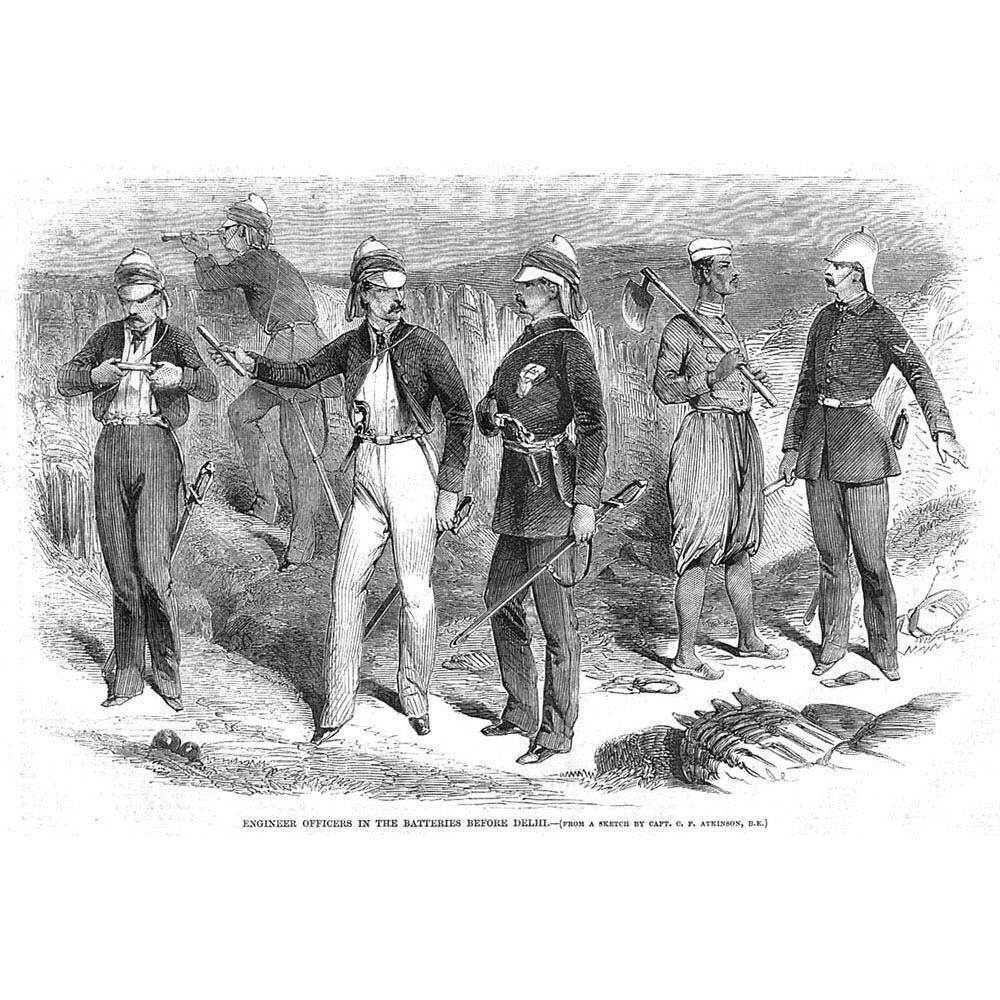
The arrival of Richard Baird Smith on the 3rd of July finally put the engineers in brisk working order. Although they had been managing all along to build batteries, reinforce posts and generally see that the Ridge had a line of communication, a serviceable road and the basics of what a defensive position needed, it took the energy of Baird Smith to put it all in shape. He was quick to understand the danger the British were really in – an official return supplied to Smith on the 4th of July showed that the entire ordnance supplies were dangerously low – for some guns they were entirely reliant on what the camp followers could pick up from the field while the whole supply of powder for the seventeen siege pieces was no more than 11’600 pounds, scarcely enough for a full day of active firing (if all guns were in constant use) and only 12,900 pounds of powder for the muskets was available. With an all-out attack out of the question, Baird Smith recommended “systematic provision for reducing the waste of life on the Ridge…and though the means were both small in men and material…they should be used and multiplied if the positions were to be maintained for even a day…” So, he undertook the vast undertaking of equipping the Ridge not as a siege fort but as a refuge for the besieged – a change of tactic that saved countless lives by making the existing positions easier to defend. Ample cover was provided for the troops while jungle, brushwood and trees were cleared to reduce the cover for the enemy.
One of the problems facing the Ridge was its close proximity to the river. Although it did ensure that they had an abundant supply of water and were not wholly reliant on wells, it was nearly impossible to guard each bridge which crossed it – cutting a bridge of boats was one thing, but the canal running nearly parallel with the Ridge was crossed at different points by stone bridges and these required sentries the British could ill-afford.
The engineers undertook the task of destroying all the bridges by which the enemy could cross the Western Jamuna Canal or the Nujugghur Jheel Drainage Cut – although some were battered down with artillery, others, whose superstructure consisted of wood on masonry abutments and piers were demolished using small charges to destroy the stonework, while the remaining wooden beams would be carted away and put to use on the Ridge.
From the 10th to the 14th of July active work was started to strengthen the right flank of the position or what was commonly known as The General’s Mound, so named after Barnard’s penchant for standing here to observe the battles – it was not much more than a disused brick kiln, its crest “roughly formed into a battery for three heavy guns.” Settled as it was quite far into the Ridge, it was with some surprise when, on the 9th of July, the rebels broke through it.
